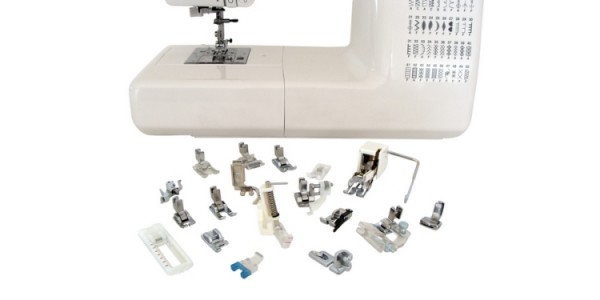
A Quick Guide to Your Sewing Machine Presser Feet
If you're wondering about various sewing machine feet: what they are, how they work, what sort of foot you need, the differences between the different version, and whether the foot will fit your machine - Read on.
Here is a brief article, an overview on various foot for your sewing machine – hopefully it will get you thinking about exploring what might be possible with your machine with a new presser foot!
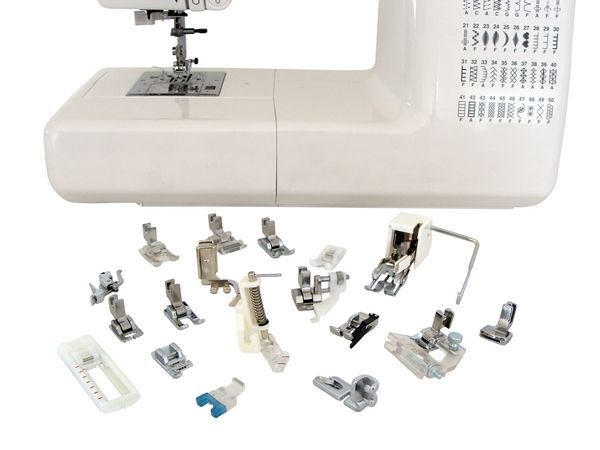
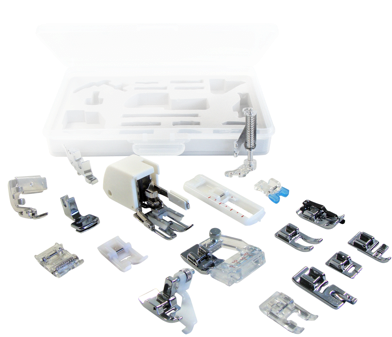
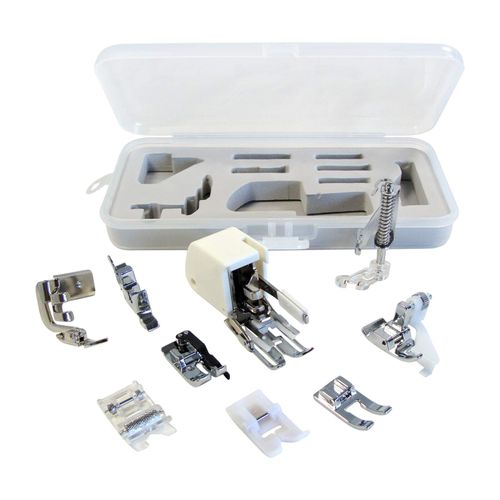
Ok, let’s get started (and you can find the individual foot here):
Here’s a list of characteristics of each foot, and what they’re best for:

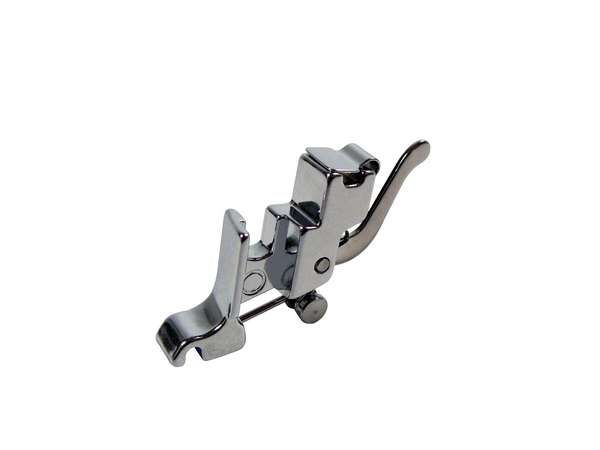
Evenfeed Walking Foot
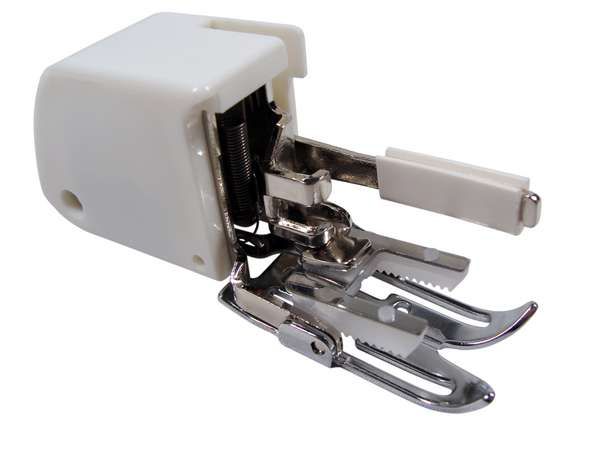 Also referred to as an “Even Feed” foot, a walking foot is design specifically for sewing multiple layers of fabric together… that’s what you want when you do Machine Quilting and putting bindings on your quilt.
It is also very useful for matching patterns like large motifs, checks, stripes and plaids. If you sewing anything on the bias, or use ‘fluid’ kinds of fabric like silks and satins, you will get a smoother result by sewing with a walking foot.
Here’s a guide that shows you how to attach the walking foot (same method applies to other screw-on feet).
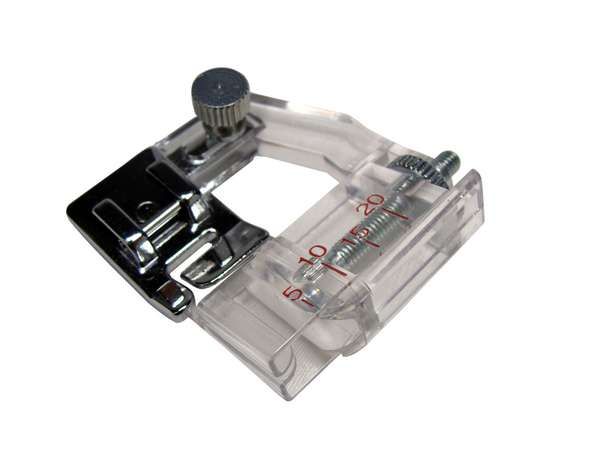
The full name is “Universal Adjustable Tape / Bias Binding Foot”. Use the dials and adjust the foot to suit various width of bindings.
A VERY specialised tool, all this foot does is put bindings around the cut edge of the fabric (often a contrast colour, might even be in completely different weight / type).
Using this foot ensures your binding is always neat and professional-looking; without any hand tacking or excessive pinning.
Also known as a “Patchwork Foot”, this quarter inch foot has a built-in guide that keeps your fabric in-line… a consistent, accurate seam allowance that is exactly 1/4 inch (or 6.3mm)… no matter how fast you sew!
In dressmaking, a 1/4″ (or 6.3mm) seam allowance is perfect for curved edges like armholes and collars. Also useful in French Seams, it’s easy to achieve neat and accurate results every time.
This foot is also great for making fabric bags and hats, where you would generally use an iron-on interfacing, and therefore need a smaller seam… this is also handy for cloth doll, “softies” or teddy bear making.

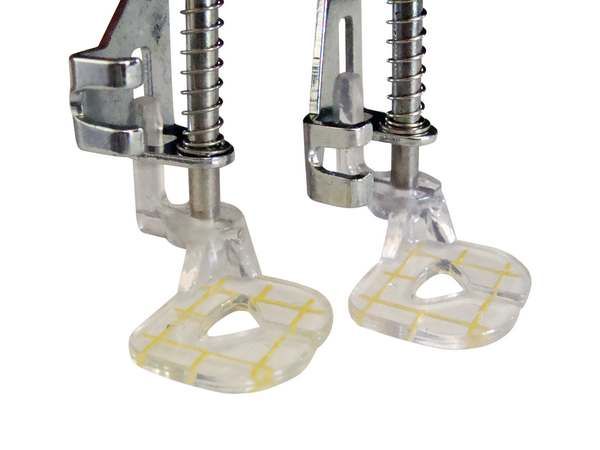
Also known as a “ Stippling Foot” or “Free-Motion Embroidery Foot”, it is design specifically to NOT use the feed dog by dropping it or covering it.
Since there is no contact between your quilt and the machine between stitches, it gives you maximum freedom to quilt or embroider any kind of curve line as you wish.
If you are a quilter, then you will need to use this foot for free-hand machine quilting or “stippling”. Check out the "Open Toe" version of the Darning Foot, for better visibility.
Sometimes called an “Open Toe Embroidery Foot” (there is a snap-on version too). The open front ensures greater visibility while sewing, it has a stitching area wide enough for maximum stitch width without compromising control.
Perfect for applique, the bottom of the foot has a rectangular shaped indentation, which allows even satin / blanket stitching to glide under the foot without dragging.
The toes of the foot are shorter, compared to a regular zigzag foot. This makes it easier for those who would like to try machine embroidery before completely going free-hand on the darning foot (kinda like a training wheel for learning machine embroidery… if you like).
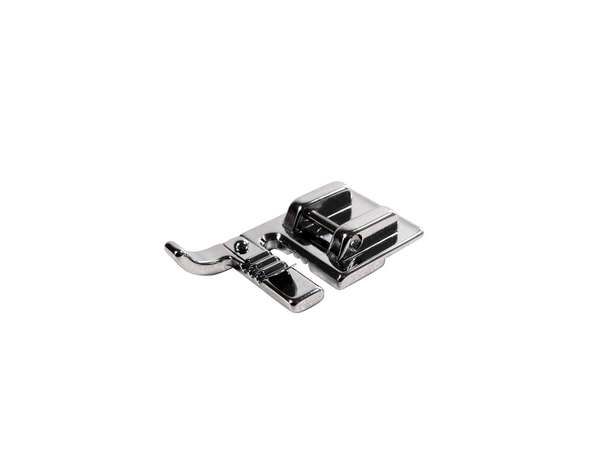
 Roller Foot for Denim / Velvet / Leather
As its name suggests, this foot has rollers that roll on top the fabric – it’s very much like the track on a bulldozer (but much gentler) for sewing up and over heavy seams and uneven surfaces.
Roller Sewing Machine Presser Foot (and the more popular snap-on verion) is effective for preventing difficult or heavy fabric from slipping or puckering or jamming up under the foot, because the presser foot rotates to feed the upper layer together with the lower layer. Excellent for denim, velvet or leather!
Using this foot ensures your blind hem is always neat and gives your garment that tailored-finish; without having to painstakingly hand finish your garments – because hand sewing takes time that most of us do not have!
You can produce professional-looking hems fast – simply by using the blind stitch on your sewing machine. This is easy once you know how.
Having this foot and learning how to use it saves you heaps on alteration bills too!
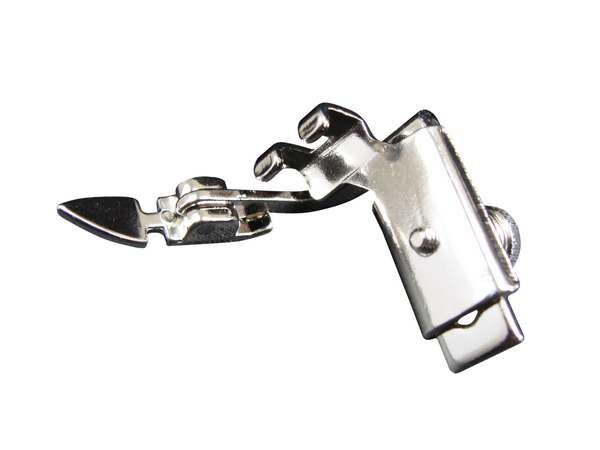
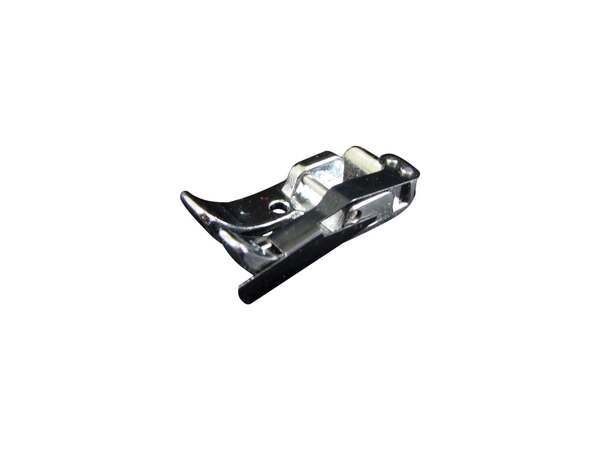
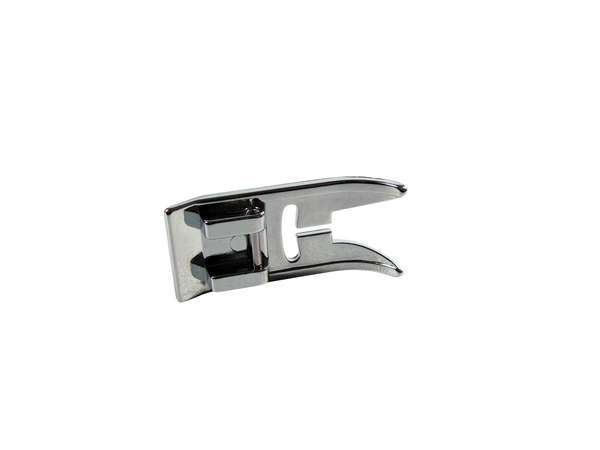
Much slimmer than the squarish, wider snap-on zipper foot that often come with your sewing machine, the shape and size of this foot makes it easier for inserting zippers, press-studs (or “snap”) tape, and sewing pipings and other trims.
What this foot does is simply get your needle REALLY close to “the bump” (which is your zipper teeth or your piping cord) and still hold your fabric down as you stitch them, eliminating the risk of losing control or breaking needles.
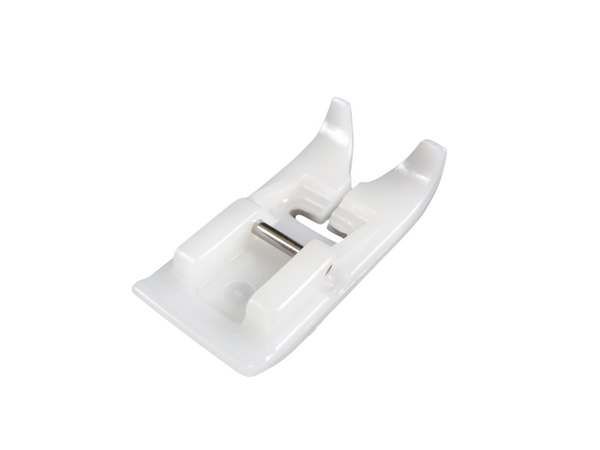
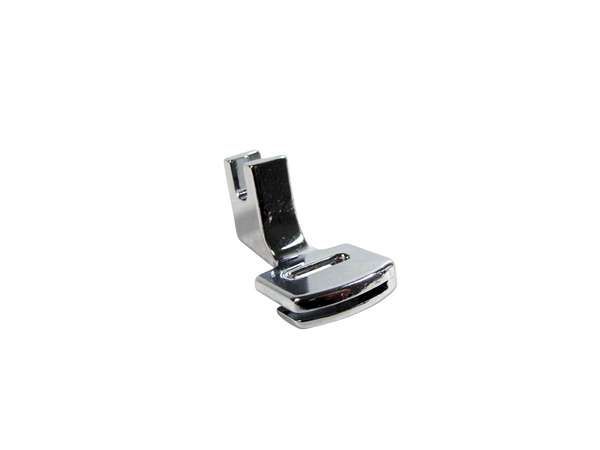
A coating of super smooth Teflon on the sole of this foot makes it glide over your sticky, rubbery fabrics that “grabs” or anything else that gives a metal foot a hard time.
This foot is designed to prevent fabrics such as leather and vinyl / oil-cloth, plastic, suedes and ultrasuede from sticking to the bottom of the foot and to the foot plate of the sewing machine.
The shape of this foot is the same as your regular straight stitch / zigzag / all-purpose foot to suit ANY situation.
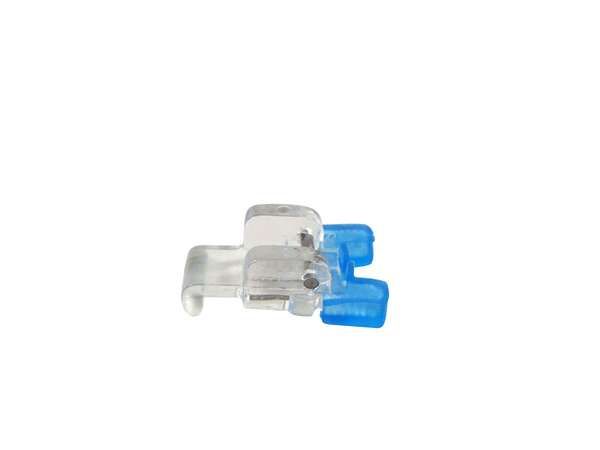 Button Sewing Foot
Do you find sewing buttons by hand tedious?
I know I do…..
Now you can use this foot to sew buttons onto practically any garment – with your sewing machine. Yay!
If you are making a new outfit with button-through features – such as a shirt-dress – imagine how much time you’ll save with this foot!
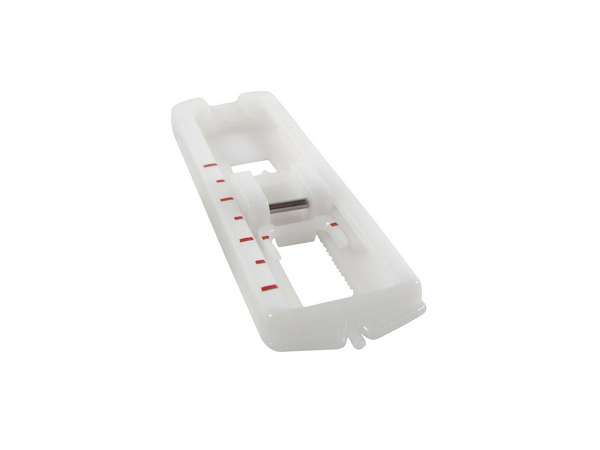 Button Hole Foot
With this foot you don’t need to make buttonhole markings – instead, use the red measurements to make a properly sized buttonhole – plain or corded.
The grips on the underside of the foot help feed your fabric for a beautiful result.
The sliding frame of the foot provides improved fabric guidance while the buttonhole is being stitched.
The red marker (slide) makes it very easy to reproduce identical buttonholes when you have a basic machine which does not have automatic button hole functions.
 All-Purpose Foot
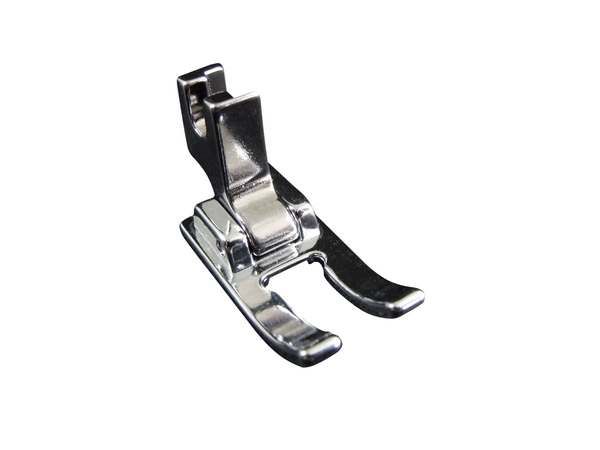
Probably the most versatile foot – that’s why it’s called “All-Purpose” – this is the foot to simply leave on your machine for general sewing.
The shape of this foot is ideal for your regular straight stitch and zigzag to suit almost ANY situation… and this means you’re covered for most sewing projects imaginable!
 Cording Foot
This foot is used to installed one to three cords lengths in place for cording.
You can embellish cushions, garments, or whatever you like with this amazingly easy to use foot.
Try different threads, cords and fabric combination to creat one-of-a-kind result. Have some fun with it….
Use this foot for lightly gathering fabric as well as attaching the gathered edge to a flat (ungathered) fabric – at the same time – quickly and easily.
The gathering foot will allow you to gently ease or slightly gather fabric for various garment and home decorating applications.
However, if you are looking at creating fuller / heavier gathers / ruffles, then it is best to try a “ruffler”.
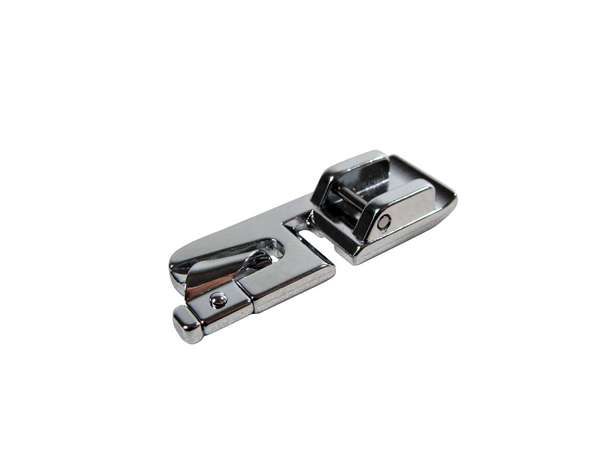
This foot will give your projects a bespoke finish, by creating beautiful narrow rolled hems on lightweight fabric, which could be extremely tedious if done by hand (could you imagine even trying…?)
Like all specilty finishes, be sure to test your chosen fabric / thread / needle before commencing, so that you can be 100% confident that your narrow hem will come out every bit as professional as it could!
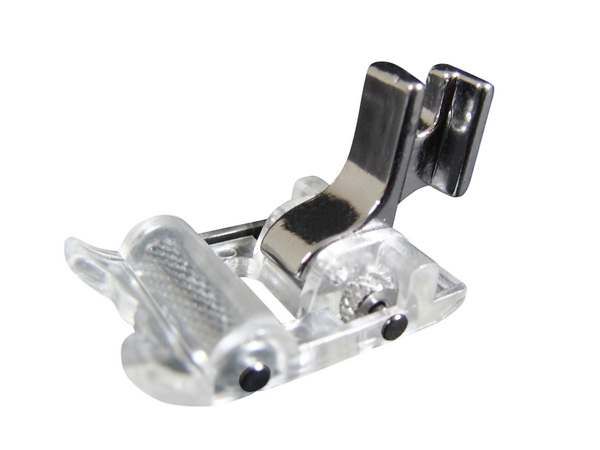
This versatile foot can be used for a lot of stitches from straight stitch to zig zag / satin stitches, especially useful to ensure perfect feed at the beginning of sewing heavy weight fabrics.
You will also find it a very convenient foot when doing applique, embroidery, cutwork and monogramming.
Being clear, you have maximum visibility and control especially when working with intricate designs or going over delicate laces.
 Low Shank Snap-on Foot Adaptor
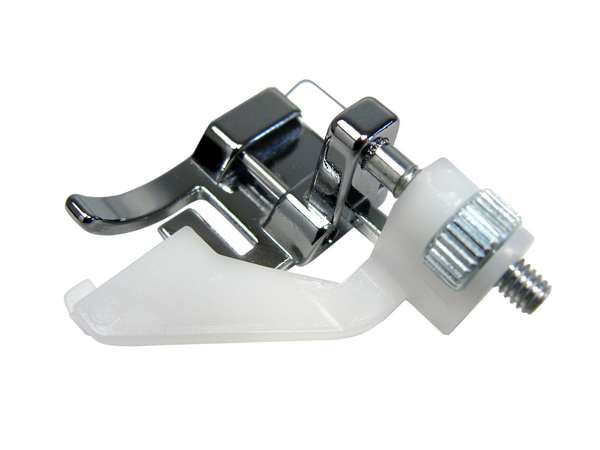
Most of the general presser feet that come with your sewing machine are “Snap-On” or “Clip-On”. There would have been one of these on your machine if you purchased a new machine.
This one simply provides a back-up, in case you cannot locate your original one after taking it off to put on a “screw-on” foot such as your walking foot or darning foot.
Not having an adaptor simply means you CANNOT use any snap-on feet – which would be most of the feet that came with your sewing machine.
Can you live without one?
![]()
Almost all of the feet that came with your sewing machine will be the “Snap-On” type.
Including the Satin Stitch / ZigZag Foot, Overedge Foot and our Quarter 1/4 inch Foot as opposed to the “Screw-On” type (your Walking Foot, Darning Foot and Binding Foot belongs to this group, so is your ruffler).
Would this Presser Foot be right for my machine?
You will notice that some feet can simply “snap-on” or “clip-on” your machine. This type of foot generally fit all machines that can take a snap-on foot.
And then there are some feet that are “screw-on”. This is when you need to consider the “Shank Height” of your machine, because there are TWO variations:
Low Shank & High Shank - what’s the difference?
High Shank (left) Low Shank (right)
Most domestic machines have LOW shanks. Just to give you an idea, we sell about 10 low shank presser feet to ONE high shank foot.
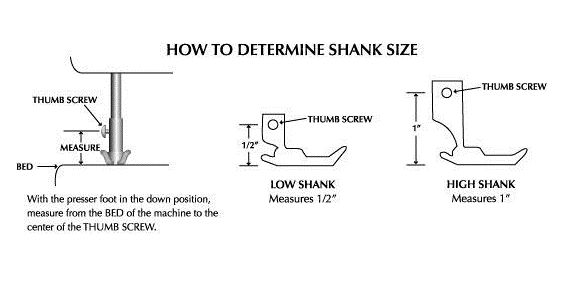
That means if you don’t know what sort of shank your machine has, it’s probably a low shank. Because High Shank machines are generally “fancy” embroidery models which are more costly, and those who invest in these models tend to know exactly what shank type it is.
And, if your machine takes a clip-on (or snap-on) foot, then you can simply get a wide variety WITHOUT worrying about what shank it might be ![]()
Hope this clears up a few things you might be wondering about sewing machine foot!
Here’s another tutorial that explains in more details about sewing machine types, and how to tell if the foot will fit:
"Will This Foot Fit My Machine?"
And if you’d like to learn some “Behind the Scene” Secrets, Read THIS :
Not All Presser Feet Are Made Equal
Now that you know how to tell whether a foot will fit your machine, Which foot would you like to try?
https://www.sewmucheasier.com/presser-feet
Happy Sewing!!
xoxox
P.S. Still want more? Here's a FREE Comprehensive eBook for you:
Download it Now - it's yours.
You'll find heaps of useful (yet non-boring) information to actually help you sew easier (with less unpicking) - no matter where you are in your sewing journey :-)
Enjoy!


Thank you so much!
- Shannon
This has been very helpful to identifying different feet, thank you
- Claire
Brilliant justo bought a box of snap on feet now I know what they do!
- Belinda
I have a Singer Sewing Machine and I have had it for about 10 years or so. I didn't realize how much there was to sewing. I am doing alot of reading and learning as I improve in my sewing skills. I am working on my very first quilt, the disappearing nine patch. I began on August 9 and keeping little notes in a notebook of all the work that I am doing. I want to see how long it will take me to complete this quilt. The size is 60 x 72. Since it is my first quilt I titled it Trial and Error. I also work full time and take care of my mom who is elderly. So I work on it when I can. I do thank you for what you shared, it is very helpful and informative.
- Jeanne
Thank you! This is a wonderful reference source. I have a Viking Rose and have just recently figured out which non-Viking presser feet fit it. I really cannot afford the genuine Viking feet. So far, it appears I can use any "snap on" foot. But your post tells me what the different feet are for. Thanks again.
- Betty
Thank you for this. This was a very handy guide to find. After sewing for many years I learned a number of things about different feet!
- Mary
Thank you! I'm still a newbie.
- Miriam
This post was extremely helpful in identifying my feet. Now I have each one labeled.
- Denise
Thank you for the help with identifying different feet. This was very helpful to me
- Linda
I just got a set with 11 feet for my sewing machine. I couldn't identify half of them. This was most helpful! Thank you!
- Kristen
I have so many feet for my machine and I don't know what they do, now I know thank you.
- Ann Maree
Great information
- Sandra
Thanks alot! This helped alot! I just got a sewing feet kit that did not come labelled. Thanks to you I hv it all sorted out.
- T
Thanks great..!
- Luz
Thank you for such a great informative email.
- Kim B.
This is exactly what I was looking for to begin my goal of naming all my feet I have collected in a box since I began sewing 50 years ago. Some came with various Singers I have used over the years, and some I have bought seperate.
Now I want to identify all the ones I have for my daughter. Thanks
- Patricia
Thank you, this has helped me understand how to use all my presser feet correctly. Your a diamond.x
- Clare
Thank you I learned something
- Vicki
Ohhh and Thank you! I needed this to learn more about my sewing feet. I'm a beginner so this was so helpful!
- Sarenda
Thank you that was just what I needed to know
- Joanne
thank you for this
- Lynne
My granddaughter 17 yrs old has been sewing for 3months just made her first buttonhole practised twice and she was ready to do her buttonhole it was perfect.
- Pauline
great tips, thank you!
- Joan
Lots of good info. Thanks....learning more and more.
- Christine
great infomation now I have a reference that will help me know what each foot can achieve thank you.
- Billie
Thank you for this. This is so very helpful.
- Khubsurat
Is it possible to use low shank feet on a sewing machine that came with clip on feet? I have a collection of feet bought for an older machine and it will cost loads to buy the clip on version. Thanks for your help!
- Elena
- Hi Elena,
Yes, definitely!
All you need to do is unscrew the clip on adapter off your machine, and then fit the low shank foot onto the bare shank (as you would for a darning foot or a walking foot.
You might find this other article useful (the photos show which part of the machine you need to take off):
Hope this helps, and let me know if it makes sense :-)
Shelley
Thankyou for all the terrific information. I have learnt a lot just reading it.
Have you perhaps put it altogether in a book? If you have I would like to buy it.
- Iva